You can/do not have to use invoice creation in the app. This is an optional functionality, but we recommend using it as it is another of the many things Zooza will solve for you under one roof.
Invoice
An invoice is a tax document for the client for the services they have ordered from you. In this case, the registration or product serves as the order, within which all the necessary information about the service and the client is recorded. The invoice does not serve as a receipt of payment.
Confirmation of receipt of payment
An automatically generated email is used as confirmation of receipt of payment, which is sent to the client as soon as the payment is paired to the registration in the system. For more information on payment matching, please refer to the instructions.
Billing profiles
Create a billing profile
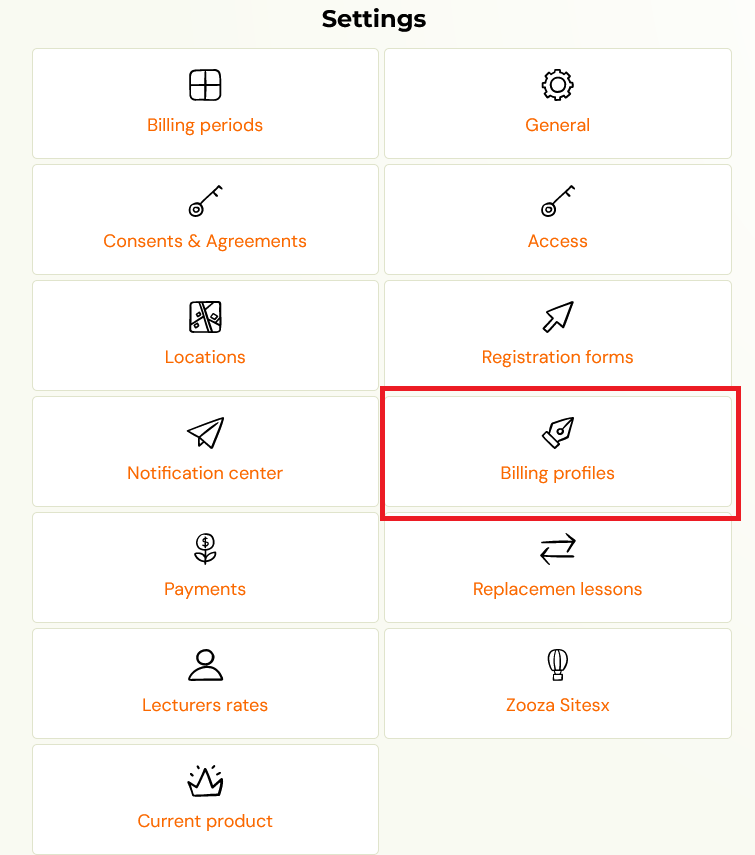
A billing profile is important for generating invoices so that you have all the necessary information pre-filled. You can also create multiple billing profiles if needed- this will be used if you need to invoice some courses to different details. You can create billing profile in the general settings:
Default billing profile
The first profile you set up is the Default Billing Profile. You use this profile to invoice all courses unless you decide otherwise.
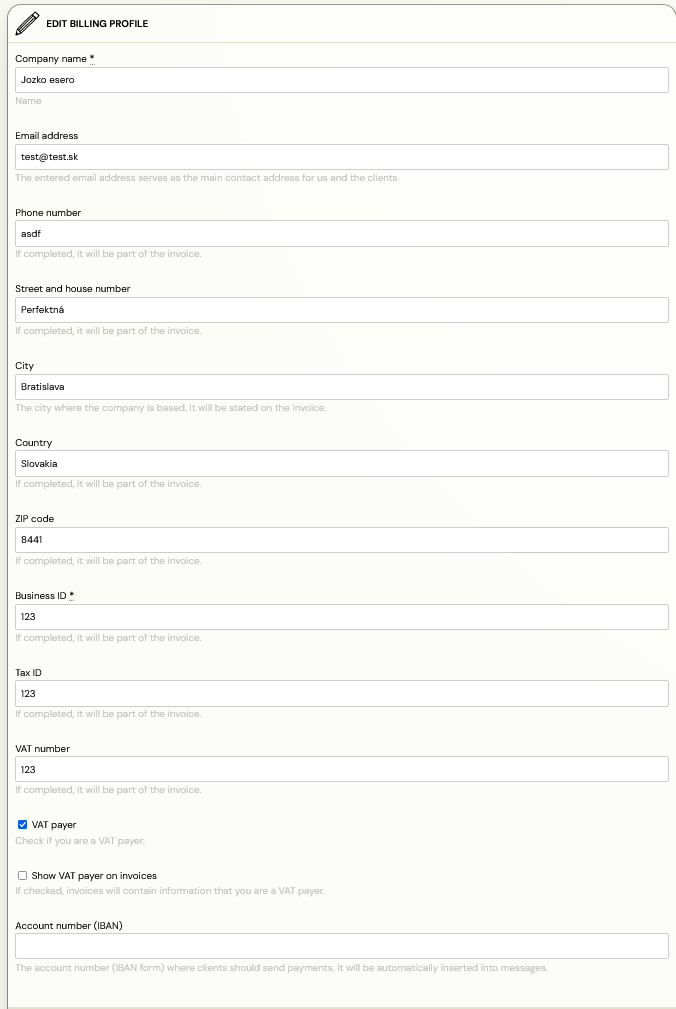
- When you open the Billing Profile Settings, find the Default Billing Profile section and click Change.
- Fill out all required fields that need to be visible on an invoice.
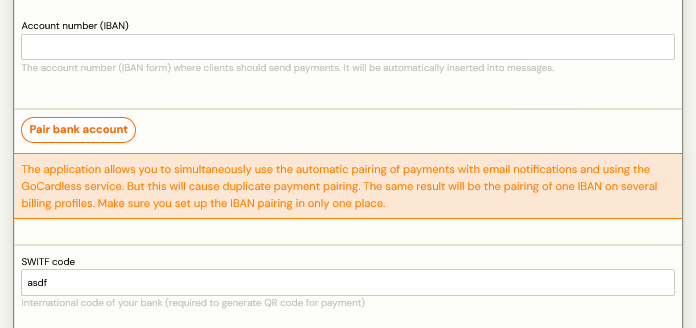
- Fill in the IBAN account number and its SWIFT code. Customers will send their payments to this account. Depending on which bank you have an account with, you have the option to automatically pair payments. You can find out more about how to set up this payment matching here.
- For pairing payments without further setup, Zooza has prepared an option for matching via the GoCardless service. You can set this up by clicking on Pair bank account. This will open a list of banks (filtered by region). Select your bank and click on its logo. You will then be taken to internet banking and confirm the pairing of your Zooza account with your bank. To learn how to apply this setting to your courses, read the manual on creating courses, section Payments.
Important to know:
- With GoCardless bank account matching, you can add multiple accounts if you have created accounts with multiple banks.
- Currently, you will be paired 2 times a day via this feature. This means that if a customer sends you a confirmation of a payment, it will take a while before you will see it directly on the customer’s registration as a paired payment and thus the payment status will change to “Paid”.
- Pairing via GoCardless is still under development and therefore it may happen that the payment is not paired correctly. In this case, you need to let us know at support@zooza.online to get the payments paired.
- For example, if you are cancelling your bank account or do not wish to use it for other reasons and wish to cancel the pairing with Zooza, you can cancel this setting directly in your internet banking.
5. In the Item Description field, you can add a detailed description of the item, such as course/group name, child’s name, and more, thanks to the dynamic tags you use for regular communication. The item’s predefined value is the course name. A list of all dynamic tags can be found in this manual.
6. The last field you fill in is the Invoice Number, which is where you want the numbering to start. This setting can be important from an accounting perspective.
Other billing profiles
As mentioned above, if you have courses that you need to invoice to other billing information, you can create additional billing profiles that you can select later on the course.
- In the billing profiles settings, you click Add and fill in all the fields, similar to setting up a default billing period. Again, you have the option to add an item description using dynamic tags or to pair a bank account.
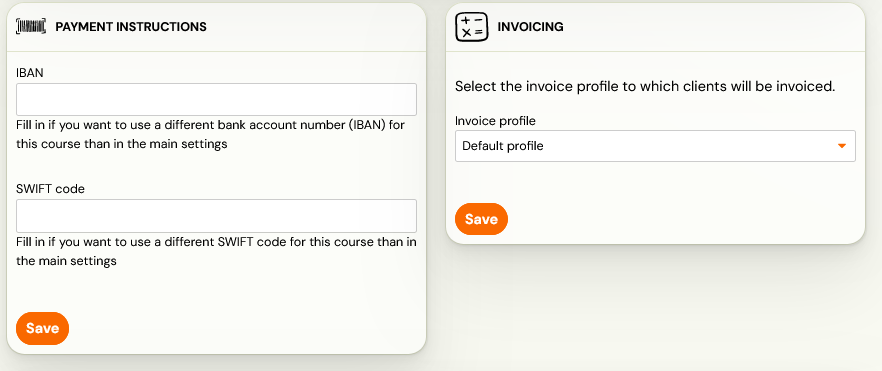
- Next, open the rate you are invoicing to this new profile and in the Price and Payment tile, click Edit.
- In tile Invoicing select the one billing profile you need.
Note: If these settings differ from the current ones, the app will notify you with a message about this change. If you are unsure about this, leave the Use New Payment Instructions box checked. This setting is important if you have entered a different IBAN in the Payment Instructions section. If you did not override this, the invoices will pull in the originally entered IBAN.
Invoice generation
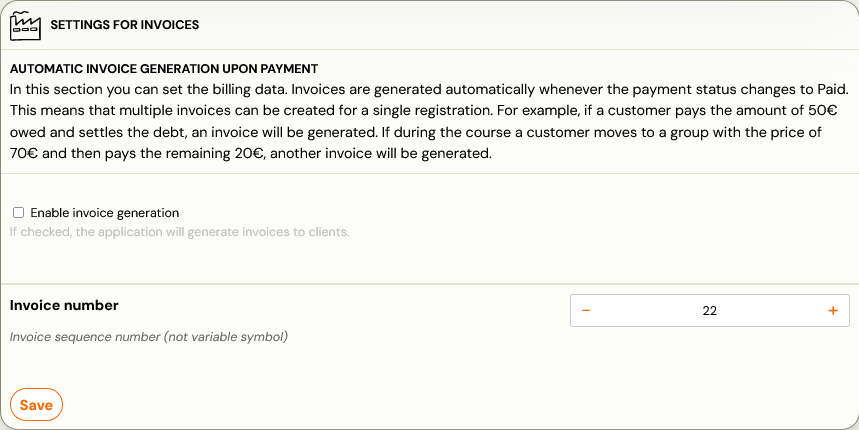
Invoices are only generated if you wish. That is, if you instruct to generate an invoice either individually at the registration level or in bulk in the global settings.
Generation occurs whenever the payment status changes to Paid on a registration or order. This means that multiple invoices can be generated for a single registration. For example, if a customer pays an outstanding amount of 50€ and thus settles their debt, an invoice will be generated. If during the course of the course a situation arises where a customer moves to a group worth 70€ and then pays the remaining 20€, another invoice will be generated.
All invoices are always issued for the full amount due, meaning that in the example above, the first invoice will be issued for €50 and the second invoice will be issued for €70.
Note: In the case of generating invoices for the client’s company, it is necessary to keep in mind that the registration must be marked as corporate. It is not enough to have only the company details filled in.
To generate an invoice you can do in two ways – individually per registration or in bulk.
Bulk invoice generation
Bulk invoice generation can be done in the general settings under Billing Profiles, where you check the Enable Invoice Generation box in the Invoice Settings section. This will always generate a registration invoice the moment the payment status changes to “Paid.”
The generated invoice is automatically sent to the client’s email and displayed in their profile after they log in and also in the administration.
Invoice overview
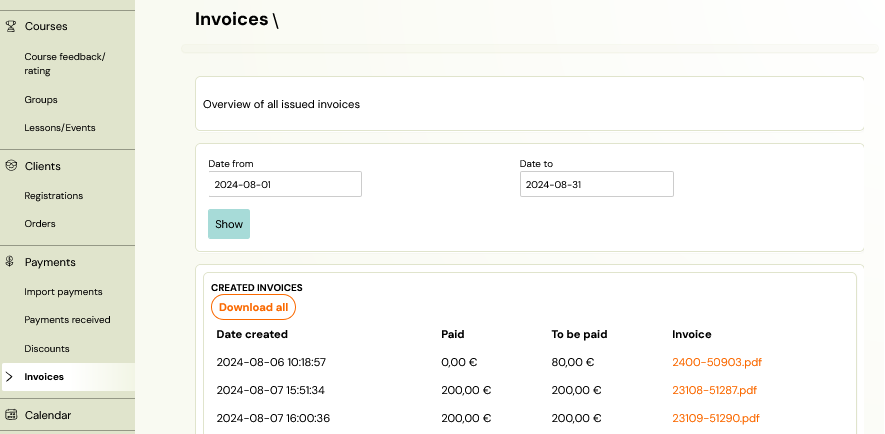
All invoices that have been generated either automatically or manually by you at registration can be viewed in the Payments- Invoices section. You can edit the list of generated invoices by entering the period. You can then download them in bulk or view them individually by clicking on the invoice name.
At registration level
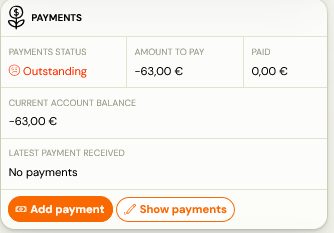
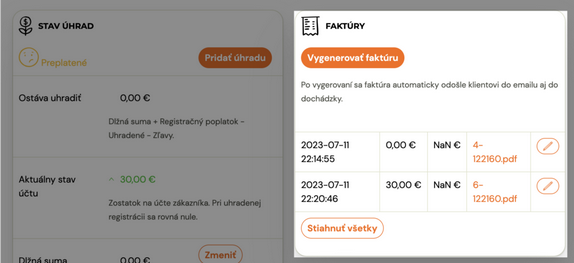
If you need to generate an invoice individually at the registration level, you can do so in the registration details by clicking View Payments in the Payments tile.
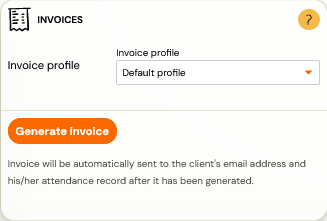
- You will then see a complete overview of payments and invoices. To generate an invoice, click Generate Invoice in the Invoices tile.
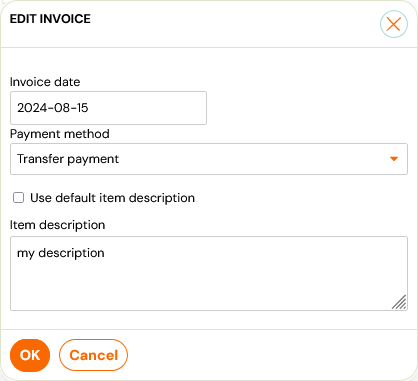
- This will open a window with information that you can change:
- Invoice date
- Payment method (Wire transfer, Cash, Card payment, Online transfer, Other)
- Item description – if you have set the item description directly in the Billing profiles settings, just check the Use default item description box or fill in your desired data in the Item description window.
The generated invoice will be automatically sent to the client’s e-mail within 5 minutes at the latest and will be displayed in the profile after logging in and also in the administration.
Changing the generated invoice
At the registration level you have the possibility to change the invoice. You can change the following data on an already generated invoice:
- Invoicing profile – the invoicing data for which you are invoicing
- Invoice date
- Method of payment
- Item description – again you have the option to use the default text from the billing profile settings
Invoice overview
On registration, all invoices that have been generated for an individual registration can be accessed in the Payments Overview in the View Payments section of the Invoices tile.

