What is a group
Groups are used to divide the course into time periods and can possibly be further subdivided, for example by level or by location. Groups ensure that the next time you repeat a course, you don’t have to create a new course with all its settings from scratch, just add a new group that automatically takes over the course settings.
Creating groups
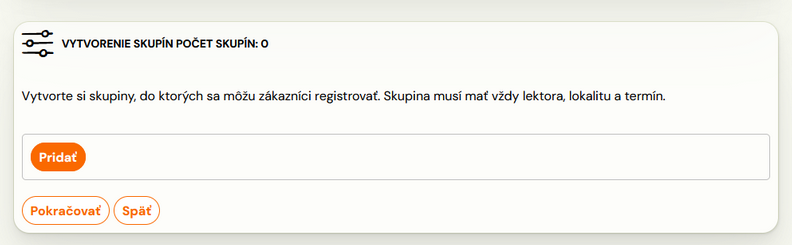
You create a group as soon as you have created a course. Either you create it directly during the course creation or add it later.
When creating a course
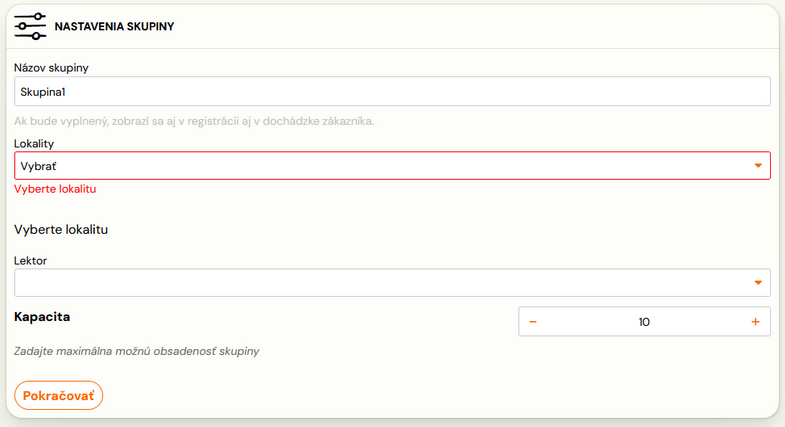
When you create a new course, you will be shown the option to create a group. Select the group settings by pressing the Add button and then fill in all the fields, which you can edit later as needed.
In the course detail
You may have a situation where you have already created a course, but you need to create a new group. You can do this in the group details when you click on the desired course and find the section called Groups at the bottom of the page. Then click on the New Group button and fill in all the fields.
Groups overview
An overview of all groups is visible in the Groups category in the left menu, where you can see and filter groups according to the following parameters:
- Group name (search text field)
- Billing period
- Registration type
- Course
- Place
- Lecturer
- Status
- Day
- Beginning date
- Ending date
- Labels
Above the filter you have 3 buttons:
- Group attendance report
After applying the necessary filters you can export the complete attendance report for all filtered groups. - Group export
After applying filters, you can export summary information about the groups (in tabular form as you can see in the group detail). - Send email
If you need to send an email to multiple groups, after applying filters you can do so as you are used to when using mass communication. For information on how to go about sending bulk emails/messages, see the Sending messages section of this manual.
 You also have the option to choose order of groups:

 You also have the option to choose order of groups:
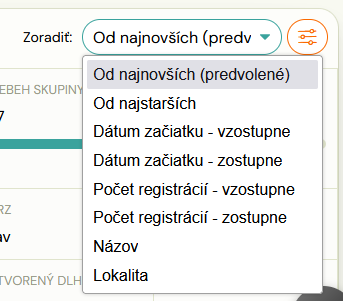
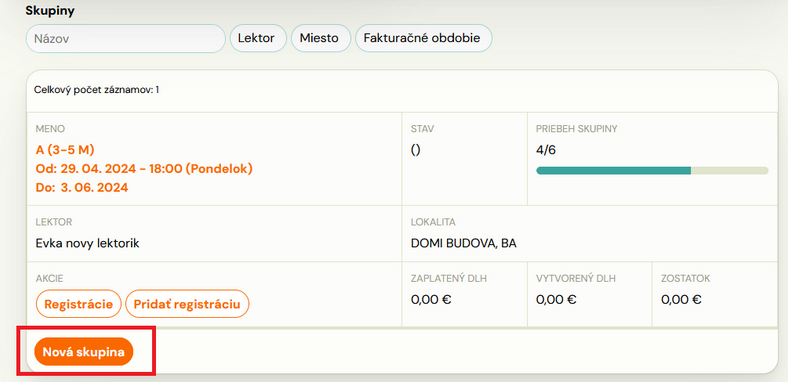
Tile groups in the list
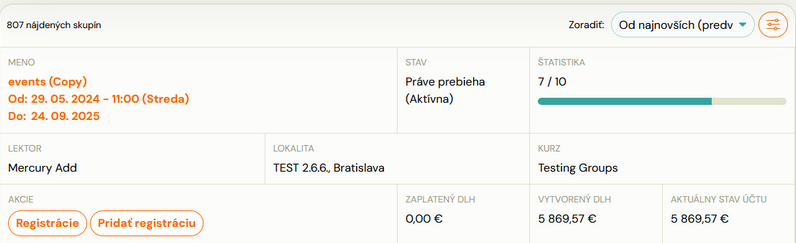
The information that appears on the individual tiles regarding the groups defines summary information to give you a general overview. You can see there:
- Group name
- Date from-to (duration of group)
- Status:
- Not started (Active) – The group hasn’t started yet, but it is active
- Active – Active and with possibility to register
- Ended (Active) – The group ended but technically it is still active
- In progress (Active) -the group already started and it is still active with possibility to register
- Archived – the group that was archived
- Ended
- Ended (archived)
- Lecturer – name
- Place – name of the place
- Course – name of the course where is the group
- Actions:
- Registrations – shows the list of all registrations to this group
- Create new registration – shows form to add registration manually
- Paid debt – how much has already been paid for registrations up to this point (how much of the total debt created on registrations has already been paid)
- Issued debt – it is a sum of all debts that were create until this moment from all type of registrations (including late and waiting list)
- Balance – shows current account status
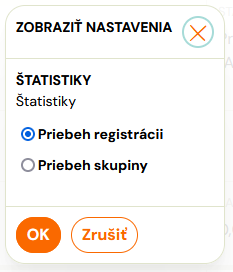
- View settings
- There are 2 types of statistics that show the progress of the group. Switching between them is set next to the Sort drop-down menu. You can choose between viewing the Registration Progress or the Group Progress. What each view means can be found in the Paid Appointments manual under Viewing/Tracking Paid Appointments.

- There are 2 types of statistics that show the progress of the group. Switching between them is set next to the Sort drop-down menu. You can choose between viewing the Registration Progress or the Group Progress. What each view means can be found in the Paid Appointments manual under Viewing/Tracking Paid Appointments.
Attention! All numbers are recalculated every 30 minutes.
Group detail
The detail of one group contains all the relevant information and settings.. They are divided into categories for a greater overview on:
- Settings
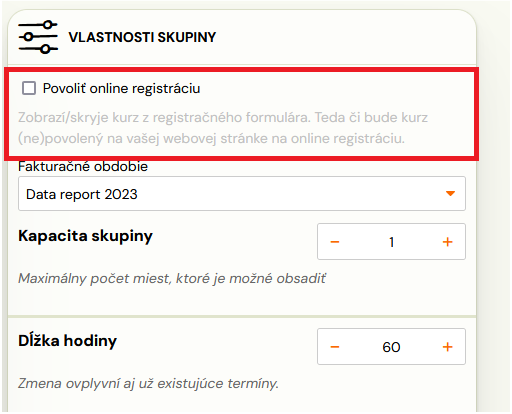
- In addition to group settings such as group name, group capacity or the option to enable online registration in the registration form. To enable this feature, press the Change button and tick Enable online registration under Group Properties.

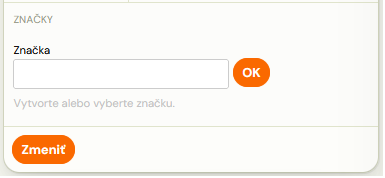
- In the Tag field, you may, but do not have to, enter the name of the category to which you want to assign this group. This tag will only serve for your better orientation between the created groups – you can set the filter for searching between groups accordingly. To confirm the tag setting, click OK next to the check box itself. This tag works the same as at course level and can be filtered out later in the group overview.

- In addition to group settings such as group name, group capacity or the option to enable online registration in the registration form. To enable this feature, press the Change button and tick Enable online registration under Group Properties.
- Lecturers
Option to add/change lecturer/secondary lecturer. - Products
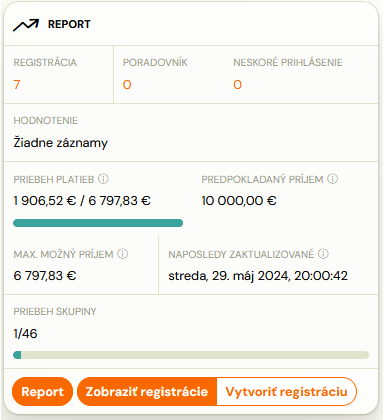
In this section you can select the products you want to sell to the group. - Report
Displays information about registrations:- Current number of registrations,
- Waiting list and number of late registrations,
- Payment progress – these fields are recalculated every 30 minutes:
- Current debt from registrations in “registered” status. If the registration has an active payment schedule set up, the entire projected debt is calculated.
- Estimated income at 100% occupancy of the group.
- Maximum possible intake at current full capacity – this includes “wait listed” and “late registration” registrations. If the registration has an active payment schedule set up, the entire projected debt is calculated.

- Price and Payment
- Documents
- Replacement lessons
- Lessons/Events
This section contains detailed information about the individual lessons in the group. For more information on how this view works, see the Overview of lessons/events section of this manual.